Showing posts with label photography. Show all posts

Friday, May 10, 2013

The Digital Portrait

Up Next:
Expression of the Human Form
The Digital Portrait


What makes a successful portrait?

What can artists convey through portraiture?

Self Portraiture
Self-Portrait, Judith Leyster, 1630

Self-Portrait, Gustave Courbet, 1843

Self-portraits are representations of an artist crafted by the artist themselves- drawn, sculpted, painted, and photographed.

Self-portraits have been around since the earliest times, but became more frequent in the mid-15th century when better and cheaper mirrors became available.

_______________________________________________________

PHOTOGRAPHY:


Things to Consider what Capturing the Human Form:
  • Who is your subject? What do you want to say about them?
  • What's going on in the background?
  • Pay attention to lighting- do you want a silhouette? side lighting? subtle lighting? What kinds of moods will different lighting create?
  • Think about clothing. Clothing can make or break the mood/effect of a photo. Same goes for props.
  • Do you want a candid shot or a traditional portrait? Candid shots can create emotions and stories that a traditional shot can't.
  • Cater to your subjects personalities!
  • Keep in mind... a portrait isn't always a face... just usually :)
  • A portrait can also be a SERIES of portraits... nobody said you have to tell a story with only one shot :)
______________________________________________________

PHOTOSHOP:

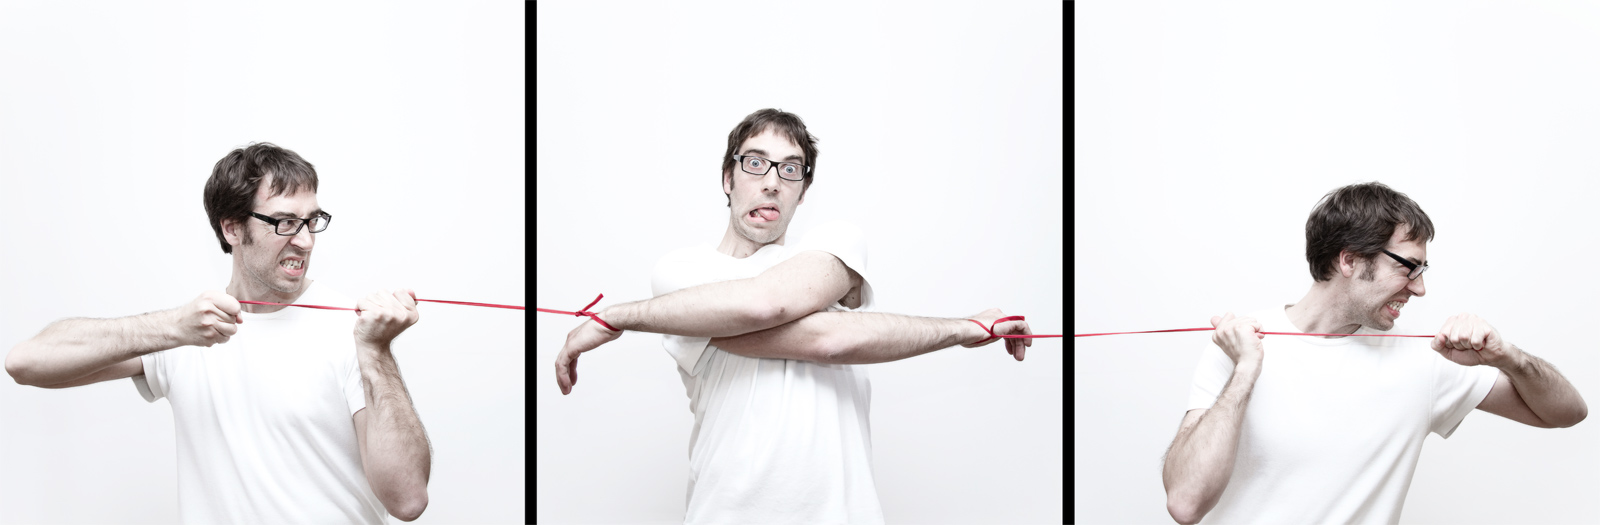
(like this one? :) There's a tutorial here if you're driven!)


Things to Consider When Processing Your Photos:
  • Photos can use a touch up in photoshop 95% of the time. Even if it's just a minor lighting adjustment.
  • Filters can be used to bring out elements of your portrait that help to tell the subject's story.
  • We know how to select objects, put things in new layers, and fill in the color of certain areas. This technique can be used to make a poster-like effect like the last one by Shepherd Fairey above.
  • You can change the backgrounds, or add in other props, but make sure they're adding to the portrait and not taking away from it...

________________________________________________________

YOUR ASSIGNMENT: 

Create a collection of portraits, including at least 1 self portrait, using any or all of the tools we have learned about so far. This includes the tricks we learned about photography AND photoshop! (A "collection" is at least 6.... although you may choose to do more)

  • At least 6 finished portraits
  • at least 1 of the 6 should be a self portrait
  • portraits can be abstract representations, artistic representations, traditional representations, repetitive representations... if you're not sure if something counts, just ask!
  • portraits should be QUALITY photographs taken by YOU with good lighting, composition, and technology (don't use crummy cell phone cameras... some are high quality- make sure you know the difference).
  • portraits should undergo some kind of photoshop process, whether it be lighting/color alterations, background changing, filter application, or intense layering.
  • At least 1 portrait MUST use layering.
Due on Flashdrives at the end of class on
Monday, May 20th.
(all 6 images)

Tuesday, April 30, 2013

Photomontage Project

Next on our agenda is a PHOTOMONTAGE.

Photomontages are similar to collages in that they are made up of multiple images, cut and pasted to make a new image.

Creating photomontages will require ALL of the skills that we have learned so far.

  • layers
  • selecting and cropping
  • resizing and moving layers
  • color alterations
  • saving images from internet- the right way! save large files manually- NO SCREEN SHOTS!
  • using digital cameras to take photos of self/other objects to include
YOUR ASSIGNMENT is actually 3 projects, each will take you several classes- Take your time, you want the edges to be crisp and clean and for it to look natural. You will have plenty of time to do these. Work dilligently.

#1- Create a photomontage involving YOURSELF. 

#2- Create a photomontage involving a famous work of art.

#3- Create a photomontage of your own personal choice.

Brad Pitt & Angelina Jolie in a Famous Painting...

Layers and Filters make this look more like a work of art

Many photos taken separately and then arranged like a puzzle in photoshop.

Tuesday, April 23, 2013

Filter Project

Yesterday, we learned about the filter gallery in photoshop.

Today and Wednesday we will be completing a project using these tools.

You will be applying filters (and other effects if you desire) to TEN high quality ARTFUL PHOTOGRAPHS. 

  • Do not use random photos of celebrities/pets
  • You may use internet photos- as long as they are larger than 1000 x 1000 pixels and ART photos- not snapshots, memes, etc.
  • You may use 10 photos that are The Same- or 10 that are different- that is up to you.
  • You may use your own photos- once again, make sure they are ART photos.
  • I would like you to use 10 DIFFERENT FILTERS. do not use the cutout filter 3 times and the Neon filter 7 times.
Your 10 filtered photos will be due On your flashdrives (as separate files, named with the filter used: CutoutJarred, StampJoe, StylizeSarah) at the end of class on Wednesday.


You will also be asked to post your Favorite- the ONE you think is the most well done, in a Blog post, with a SELF CRITIQUE. Please answer the following questions:
  • What do you think is most successful about this piece?
  • What do you wish you could change?
  • What was the most enjoyable part of this project for you?
  • Did you find anything about this process challenging?
  • Do you think you will use these filters in the future for anything?
  • How do you feel about your digital art skills so far?
Due Wednesday

Tuesday, April 9, 2013

Wordle Wednesday: Annie Leibovitz

15 words or more

This is sculptor Louise Bourgeouis
photographed by Annie Leibovitz.

Leibovitz is famous for her skill at capturing the spirit and character of her subjects. In this photo she has captured a woman who embraces her age instead of shys from it. What do you think about this photo?


Sunday, April 7, 2013

Altered Colors and Andy Warhol

The Digital Art world is limitless. We've explored scanners, blogs, wordle creating websites, cameras and photo touch ups. Now, let's make actual pieces of art.

This week we will be exploring the world of color.

Color Theory
The three Primary Colors are Red, Blue and Yellow. Primary colors are the 3 basic colors that all other colors can be made from.


When you're creating a work of art, or altering one, it's important tho think about which colors will look good with each other. This is when knowing about Complimentary Colors will come in handy. Complimentary colors are colors that suit each other, look pleasing next to each other. They reside across from each other on the color wheel.


For example, you'll notice that Red & Green are across from each other- Christmas colors! Not for no reason!

Secondary Colors can be made using 2 Primary colors. Yellow + Red = Orange.

Tertiary Colors can be made by mixing a Primary & Secondary color. Orange + Yellow = Yellow Orange.

----------------------------------------------------------------------------------------

Andy Warhol
It's very likely that at some point in time you've seen something by Andy Warhol. Perhaps his most noticeable work of art is probably his images of Campbell's soup cans and Marilyn Munroe.


Around 1960, Warhol had decided to make a name for himself in Pop Art. Pop art was a new style of art that began in England in the mid-1950s and consisted of realistic renditions of popular, everyday items. Warhol began with Coke bottles and comic strips but his work wasn't getting the attention he wanted. In December 1961, Warhol gave $50 to a friend of his who had told him she had a good idea. Her idea was for him to paint what he liked most in the world, perhaps something like money and a can of soup. Warhol painted both.


Unfortunately, Warhol found that he couldn't make his paintings fast enough on canvas. Luckily in July 1962, he discovered the process of silk screening. This technique uses a specially prepared section of silk as a stencil, allowing one silk-screen to create similar patterns multiple times. He immediately began making paintings of celebrities, most notably a large collection of paintings of Marilyn Monroe. Warhol would use this style for the rest of his life.


Warhol's signature style is bright unnatural colors and repetition. His colorful icons were often displayed in a series.

---------------------------------------------------------------------------------------

Using knowledge of the Color Wheel & Andy Warhol, we will be creating colorful artworks by altering our photographs in PhotoShop.

Start by choosing one of your favorite photographs you took last week.

Open this photo in photoshop and make sure it has good Contrast. Contrast is a strong difference in lights/darks/colors. You can fix this in PS if the photo doesn't already have it.

Tools to use to alter the color palette:
  • Paint Bucket tool
  • Adjustments --> Hue & Saturation --> slide the Hue bar
  • Color Replacement Tool! This one will be your best friend if you want to keep lots of details.
Create at least 6 different versions of the same image and combine them all as one image.
We will talk about how to combine images into one later this week.


Thursday, March 28, 2013

Photography Reference File


Make a Photography Reference File on your Laptop

Label each photo with the technique used.

Please scour the internet, magazines, and photos you've already taken to find STELLAR examples of the following photography tricks:

*Note: These should be outstanding photographs that you really get inspiration from, not the 1st one that popped up on google image.

Then post your FAVORTIE TEN on your blog and be sure to tell me what technique each is using

  1. high depth of field
  2. low depth of field
  3. rule of thirds
  4. selective color - only one thing has color
  5. macro - close up
  6. silhouette
  7. below eye level
  8. at eye level
  9. above eye level
  10. aerial view
  11. wide angle
  12. movement
  13. motion blur
  14. stop motion - no blur
  15. emotive portrait- should evoke some kind of feeling/mood
  16. landscape
  17. night photography
  18. candid - subjects don't know the photo is being taken
  19. abstract - can't tell what the subject is
  20. photomanipulation - altered in photoshop or a darkroom
  21. lines
  22. framing
  23. Wildlife
  24. Fashion
  25. perspective
  26. multiple exposure - layered photos
  27. something unexpected
  28. something for fun
  29. a series (include at least 3)
  30. SOMETHING OF YOURS!

    Emotive Portrait (note that it's not a face, but still a figure)

    Framing- when the subject has objects around it like a "frame"

    Multiple Exposure! this one has a LOT of layers, but sometimes they just have 2

    WIDE ANGLE photos can be spotted because they tend to look "bigger" on the sides, notice how the 2 waiters look so tall compared to the Newlyweds?

Eye Levels

Composition Trick Alert!

You can change the entire feel of a photo just by changing your point of view.
Lay on the ground to get a BELOW EYE LEVEL photo
Stand on a chair to get an ABOVE EYE LEVEL photo
Rent a helicopter (or a spaceship) and get an AERIAL photo!
Or, sometimes, standing at your regular height and getting an EYE LEVEL photo is all that's needed.

Examples below...

Aerial view of the East Coast (this is also a NIGHT photo!)

At regular eye level- who doesn't love penguins?

Below eye level. Worlds tallest and smallest dogs.

Another below eye level- this is also a WIDE ANGLE photo

This is WAY Below Eye Level- poppies

Above Eye Level- This photographer used a Fisheye lens, that's why it looks like a bubble!

Tuesday, March 26, 2013

A Concentration of Images

Your challenge: Create a concentration of 25 photos..

These photos should be all along a common theme. Here's a really awesome concentration by photographer Wes Naman. He scotch tapped all his subjects faces!

http://www.businessinsider.com/scotch-tape-series-by-wes-naman-2013-1#namans-inspiration-for-the-series-was-seeing-his-assistant-tape-her-nose-1


There's more if you click the link above!

This is a very specific concentration- you could do something more vague, like human emotions (show someone holding hands, someone crying, 2 people playing...)

Your 25 photos are due MONDAY, April 1st.

Remember, you may have to take WAY more than 25 photos in order to get the 25 good photos you want to submit.

If you are going to need to borrow a camera outside of class time, you will need to sign one out, for one night only, please plan ahead.


What Makes A Good Photograph?
-strong composition
-underlying story
-emphasis point
-movement
-lines
-emotion
-depth
-lighting
-capture the unexpected

Resources for further research:
http://www.kenrockwell.com/tech/basics.htm
http://www.fuelyourphotography.com/what-makes-a-good-photograph/
http://www.petapixel.com/2010/09/30/what-makes-a-great-photo-according-to-national-geographic/

Monday, March 25, 2013

Photography 101: Framing your shots

I could type a ridiculous long blog here, but I would want to steal everything from this blog:

JOURNOGRAPHICA: Basic Photo Tips: Framing Your Shots

So why not just click that link and explore? :)


The Rule of Thirds in action

Please create your own Blog post on THE RULE OF THIRDS.

Composition Trick: Depth of Field

Changing your Depth of Field can give your photo an entirely different feeling. I encourage you to play around with it on your own cameras.

Please create a blog post explaining to me what Depth of Field is in your own words, and how you might use it in your own photography. LABEL IT DEPTH OF FIELD and TRICKS

Include example images of high and low depth of fields, spend some time looking for these. It's very easy to just type "high depth of field" into google and take the first one that pops up, but I'm hoping you'll really explore the many ways in which this can be used and choose a photo that fits your own style.


Quick Refresher:
Depth of field is the amount of distance between the nearest and farthest objects that appear in acceptably sharp focus in a photograph.

A large depth of field means that a large area both in front and behind your main subject will appear sharp. A shallow depth of field implies that anything other than your main focus point will appear blurred. A smaller f-stop (F2) will create a shallow depth of field. A larger f-stop (F11) will create a greater depth of field


Thursday, March 21, 2013

National Geographic's "THE PHOTOGRAPHERS"


On your own blogs, please answer the questions below while watching the film in class. It may help to copy and paste these into a pages document, and then into your blog after answering them. This will be a Quiz grade.


1) National Geographic's pioneer photographer Gilbert H Grosvenor maintained that “The mind must see before it can believe.” Do you think this is true? Explain.


2) The photographers come across many obstacles, problems, and dilemmas while out on photo shoots. List 5 that stood out to you.


3) Nick Nichols specializes in wildlife photography. What happened with the elephants on his trip to the Rainforest? How do you think you would have reacted in that situation?


4) What do the National Geographic photographers tell you makes a great photo? (Tell me 2 things)


5) National Geographic gives some good pointers on Portraits. What did you take away from this film about photos of the human face?


6) Photographers often shoot hundreds of photos and only pick one or two from the group. Did you agree with the explanations of why certain pictures get chosen for the cover? Which cover was your favorite?


7) David Doubilet photographs underwater. He comments on making the reader “feel the ocean.” How do you think YOU can make viewers FEEL your subjects when you take your photos?


(at 37 minutes in, the Lion hunting scene in the African bush is a little brutal, some may not want to watch this, turn away until 39.5 minutes)


8) National Geographic's mission is to provide its readers “with a window on the world.”


9) What are your thoughts on the Peruvian sheep faming boy? The photographer felt that his “intrusion” had made an actual difference. How can you make a difference with your own photos?


10) Did this film inspire you in any way for your own photography? We're going to explore photography more in depth next week, what lessons will you retain from this film?


Intrigued? More exploration in this quick 5 minute video: 
http://video.nationalgeographic.com/video/photography/photographers/simply-beautiful/